Description
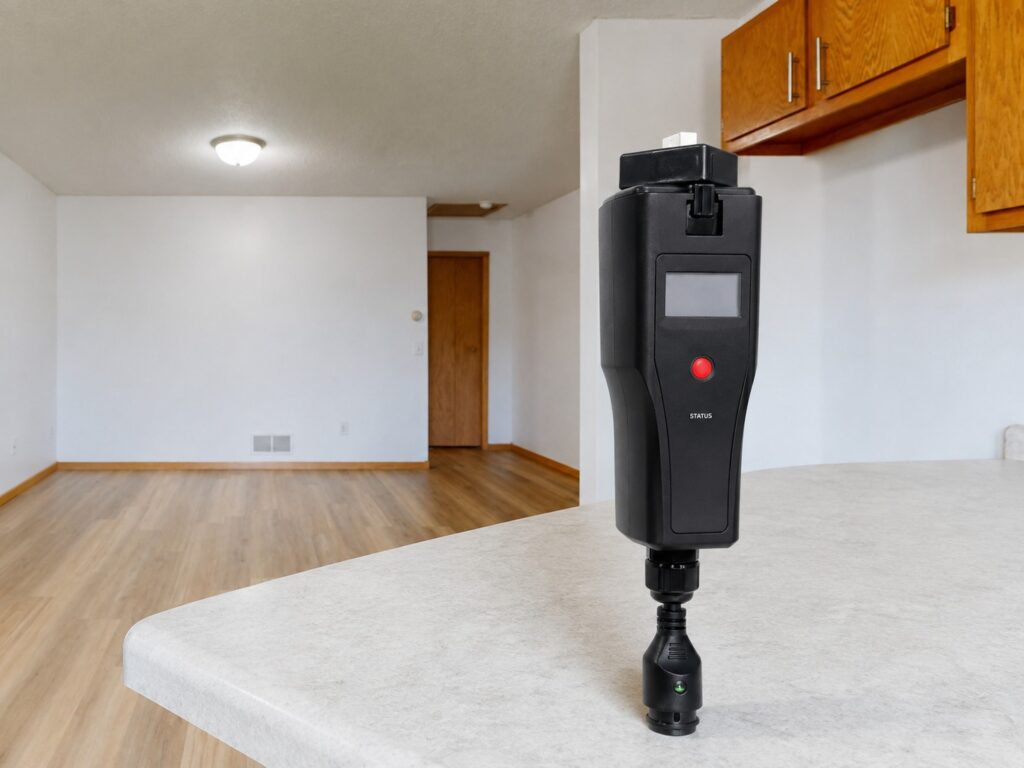
SAJ eSolar AIO3 is a plug-in data collector for one SAJ inverter. It connects the inverter to the remote server over Wi-Fi or Ethernet, gives the app local access over Bluetooth and shows the status on its own OLED screen.
SAJ eSolar AIO3 data collector (Wi-Fi/Ethernet/Bluetooth)
Wi-Fi, Ethernet and Bluetooth in one module: remote connection over Wi-Fi or Ethernet, app access over Bluetooth.
RJ45 connector on the module for the Ethernet cable to the router.
OLED screen and key on the module: grid compliance setting, power generation information and fault information.
IP65, 144 × 49 × 40 mm, 84 g: plugs into the USB interface of the inverter and is fastened with its hexagon nut.
Plugs in and locks with a nut.
The module is inserted into the USB interface of the inverter and fastened with its hexagon nut. It runs on 5 to 7 V DC and draws less than 0.3 W static and less than 4 W at its instantaneous maximum. Ingress protection is IP65 and the operating temperature range -40 to +60 °C.
For SAJ H2 and HS2 systems
The H2-(10K-30K)-(T2, T3) hybrid inverters have one eSolar AIO3 in their package and take it on the 4G/WIFI port. The HS2-(5K-10K)-T2 systems support the eSolar AIO3 as a communication module. The HS3 models with W in the designation have an AIO3 module built in.
One module per inverter
One module connects one inverter. It collects data every 10 minutes as standard; the interval can be set from 1 to 30 minutes. The data is read in the app over the Bluetooth connection or from the remote server.
Set up over Bluetooth
After the module is installed and the inverter is powered on, the app finds the module over Bluetooth; the blue LED blinks fast when Bluetooth is connected. Wi-Fi or Ethernet is then chosen for internet access. The working mode of the module is auto, WiFi or Ethernet.
Technical data
Plug-in data collector for one SAJ inverter.
- Remote connection
- Wi-Fi / Ethernet
- App access on site
- Bluetooth
- Status display
- OLED
- Ingress protection
- IP65
About these specifications
Wi-Fi, Ethernet and Bluetooth in one module with an OLED screen.
General parameters
- Inverters per module
- 1
- Inverter communication port
- RS232 (USB interface)
- Remote communication port
- Wi-Fi / Ethernet
- Data collection interval
- 1 to 30 (optional), 10 (standard) min
- Firmware update method
- Serial port / remote
- Data access
- App (Bluetooth connection) / remote server
- Status display
- OLED
Electrical parameters
- Input voltage
- DC 5 to 7 (±5 %) V
- Static consumption
- < 0.3 W
- Max. instant consumption
- < 4 W
Environment
- Operating temperature range
- -40 to +60 °C
- Storage temperature range
- -45 to +90 °C
- Dimensions (H × W × D)
- 144 × 49 × 40 mm
- Weight
- 84 g
- Ingress protection
- IP65
Others
- Mounting method
- Plug-in + screw lock
- Warranty (years)
- 2 (standard) / 5 (optional)
SAJ inverters
- In the inverter package
- H2-(10K-30K)-(T2, T3)
- Supported communication module
- HS2-(5K-10K)-T2
- Built in
- HS3 models with W in the designation
Documents
Product questions
Which SAJ inverters take the eSolar AIO3?
The eSolar AIO3 connects to one inverter via the RS232 (USB joints) communication port. The datasheet lists the inverter communication port as RS232 (USB joints) and the number of connecting inverters as 1. The quick installation guide shows the module inserted into the inverter USB interface. The guide example shows a device type H1-3.6K-S2, but the datasheet does not list specific inverter models.
What do the LEDs on the module show?
The module has a green LED and a blue LED. Green blinking means sending data to router, green solid means the module is connected to router, green off means the module is not connected to router. Blue slow blink means Wi-Fi is working, blue fast blink means Bluetooth is connected. Slow blink is 1s on, 1s off; fast blink is 200ms on, 200ms off. The RJ45 connector has its own LED indicators: green (Ethernet) slow blink means Ethernet is working, fast blink means firmware is upgrading, solid means the module is not connected to server, off means no power supply or program fault.
How is the module installed and connected to the network?
Turn the module hexagon nut to a horizontal position. Insert the module into the inverter USB interface and fasten the hexagon nut in clockwise direction. Connect the RJ45 connector to the router. After installation of the module, power on the inverter. Wait for 2 minutes; if the module signal light is blinking slowly, the module is working normally. For network access, turn on mobile phone Bluetooth connection. Sign in to the eSolar O&M APP, select "My", select "Remote Configuration", select "Bluetooth", "Next", search devices and select the Bluetooth device (such as BlueLink:00012). Then choose Wi-Fi or Ethernet to access the internet. If choosing Ethernet, make sure the cable is connected to the router.